
New features in the Salesbook installation planning module


In the RES industry, a signed contract is only half the battle. For the customer service process to be considered complete, there is one more very important element on our way: installation. At Salesbook, we make sure that this process goes smoothly and quickly, and that ordering installation for selected customer is simple and automated thanks to our installation planning module.
Read our latest article and find out what’s new in our best-selling installation planning module. And if you want to find out first how the module works, look here.
Installation planning module
The installation module was created so that the salesman, after signing a contract with the customer, can easily and quickly order, control and plan in detail the montage of photovoltaic panels, heat pumps or air conditioning.
With this tool from Salesbook, it only takes a few clicks for the selected install team to receive all the necessary information, and for the customer to receive an e-mail confirmation of the order for such installation.
It’s a convenient solution that allows documents and visualizations to be forwarded to the installation, so the salesman does not need to personally go to the installation site. All he must do is order a photo report in the system and send a protocol with the customer’s signature.
New features in the installation planning module
Automation of the installation order and inspection process is crucial for efficient customer service. Guided by the needs of our users, we have added new functions to manage the entire process even faster.
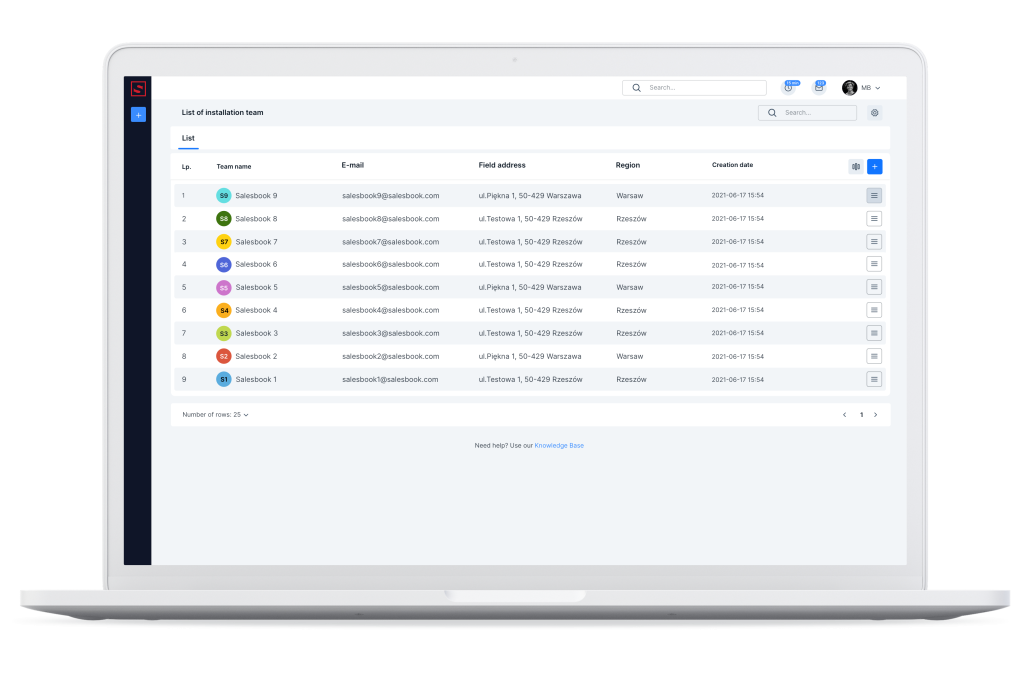
Warehouse and installation team selection
The sales representative who closed the sale, after signing the contract, can from the Back Office level order of the PV installation to the selected team. New in this module is the option to add and select the warehouse to be used by the designated team. This option can be managed from the administrator level.
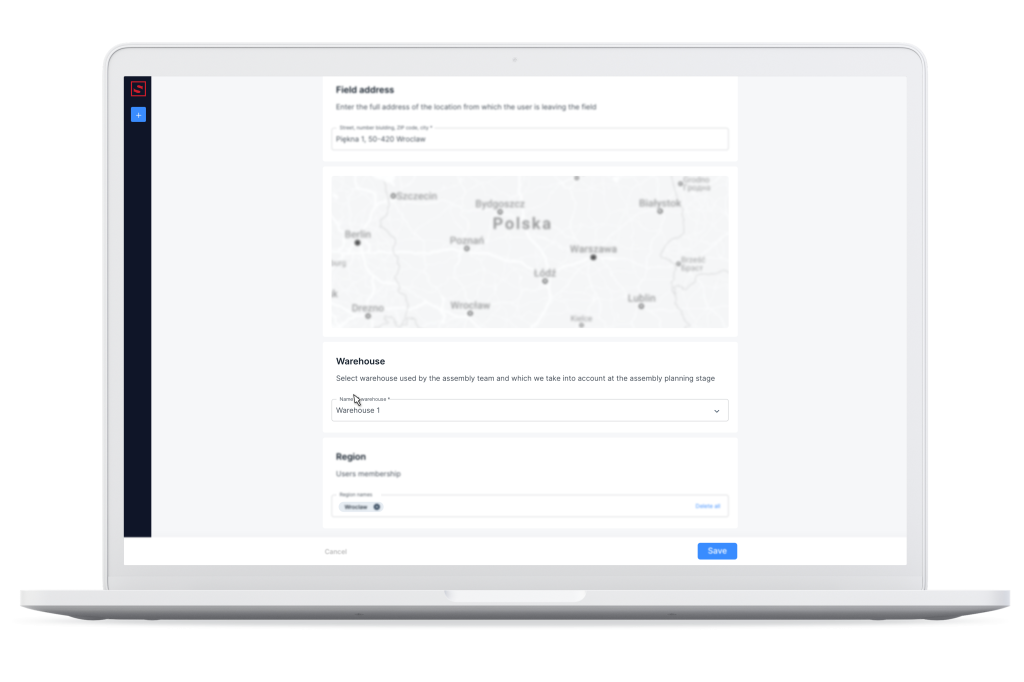
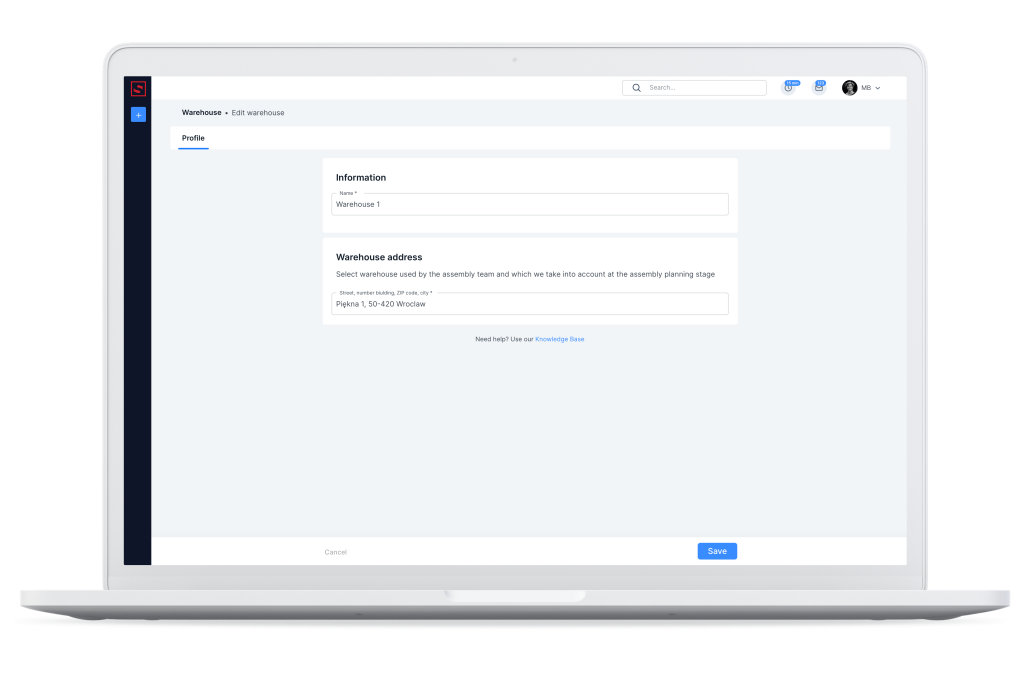
In order to be able to select a specific warehouse and assign it to the selected installation, we must first add and define the warehouses that will appear for selection in the list. We add them in the Warehouses tab in the side menu.
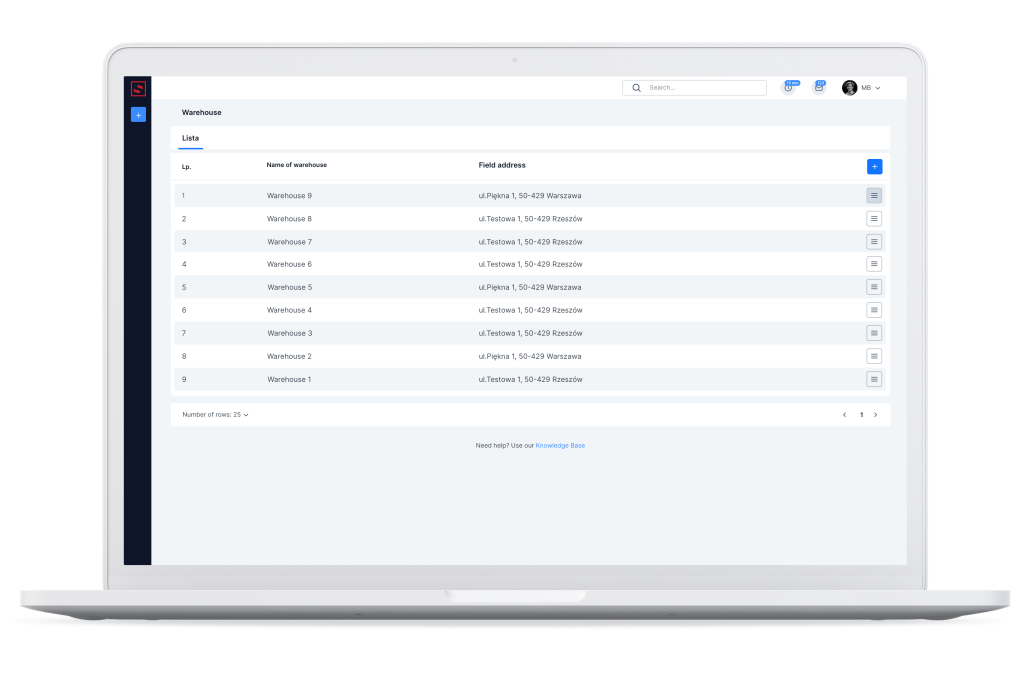
In the Warehouses tab, select the blue square with a white plus and add a new warehouse. We give it an appropriate name and enter the address.
Sending information to the installation team
The system allows you to configure the settings to send specific information to the selected installation team.
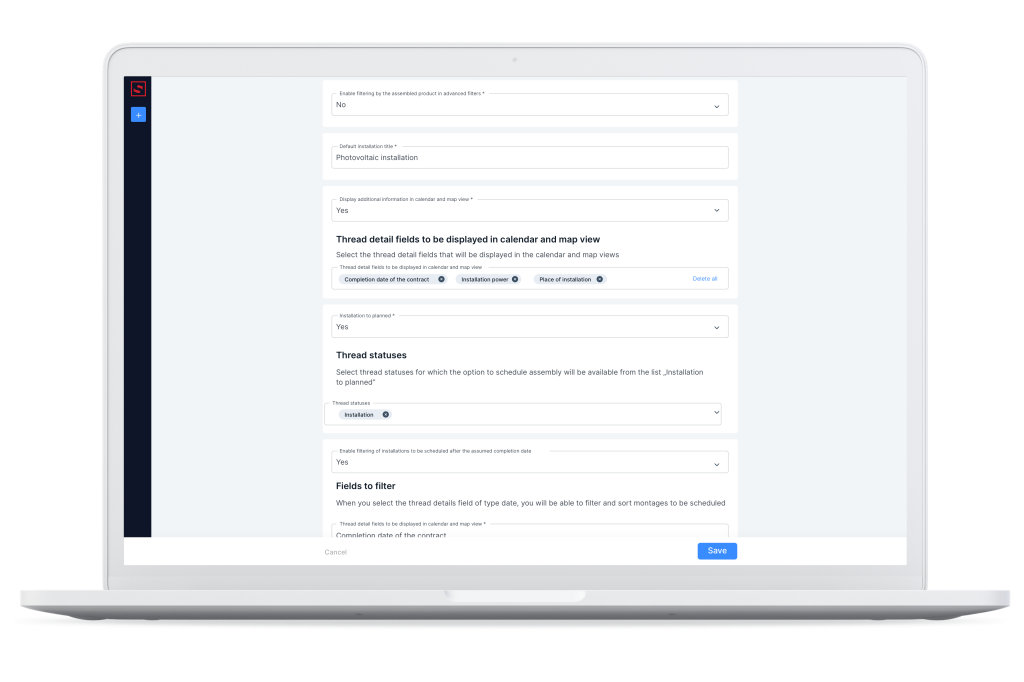
To do this, in the side menu, select Settings | CRM | Thread Details and in the main window, in the Installation field, indicate the fields whose contents can be forwarded to the installation team.
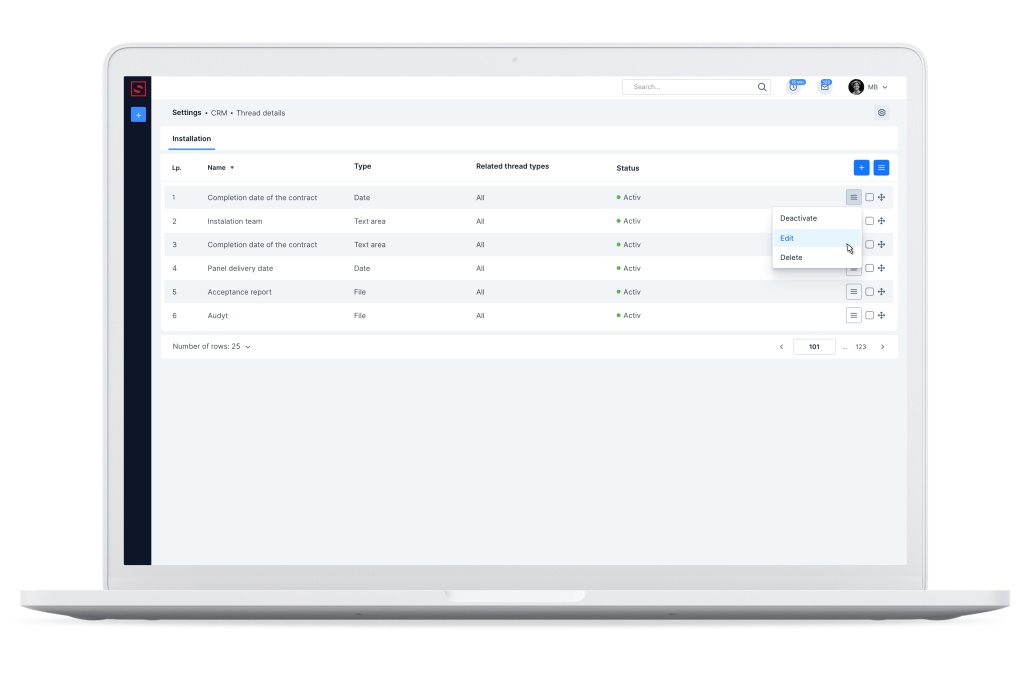
In the installation field, you will find predefined points, such as:
- installation completion date,
- installation team,
- installation start date,
- date of panel delivery,
- acceptance protocol,
- audit.
Here we can choose which information we want to provide to the designated installation team. In the appropriate field, we click Edit and check the option Include field contents in the installation process.
When the slider is moved to the right and highlighted in blue, it will mean that the information from the indicated field will be automatically sent to the installation team.
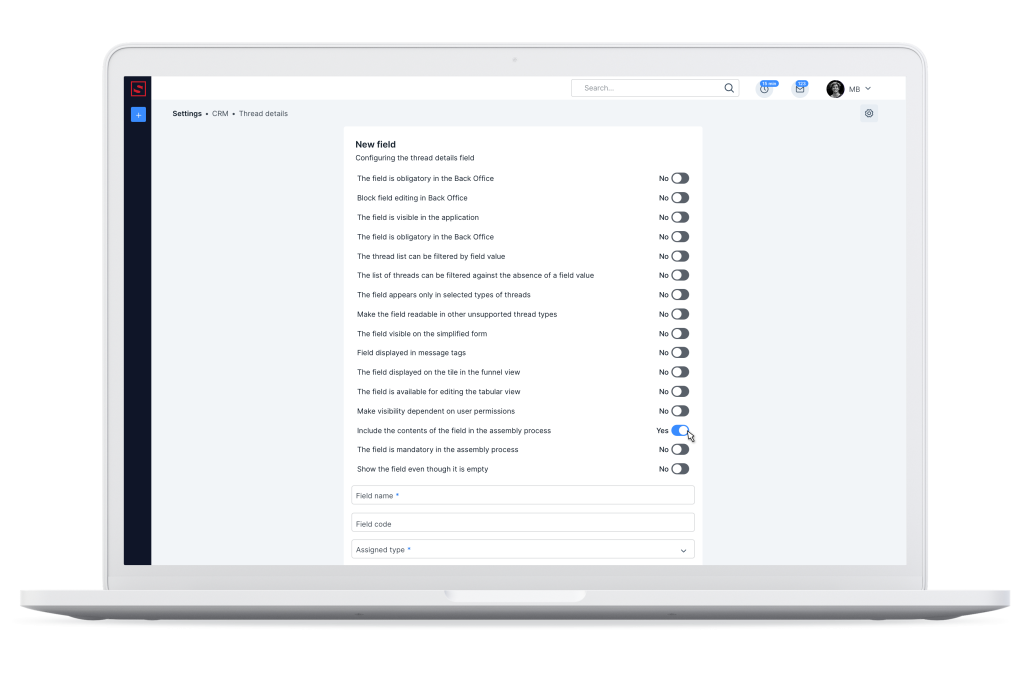
Mandatory fields in the installation process
Another new feature is the Mandatory field option in the installation process.
If during the installation process we want the team to perform some additional action, such as taking a protocol or photo documentation, we can check this option and mark the selected field as mandatory.
When this option is checked, the installation order will not be closed without performing this action.
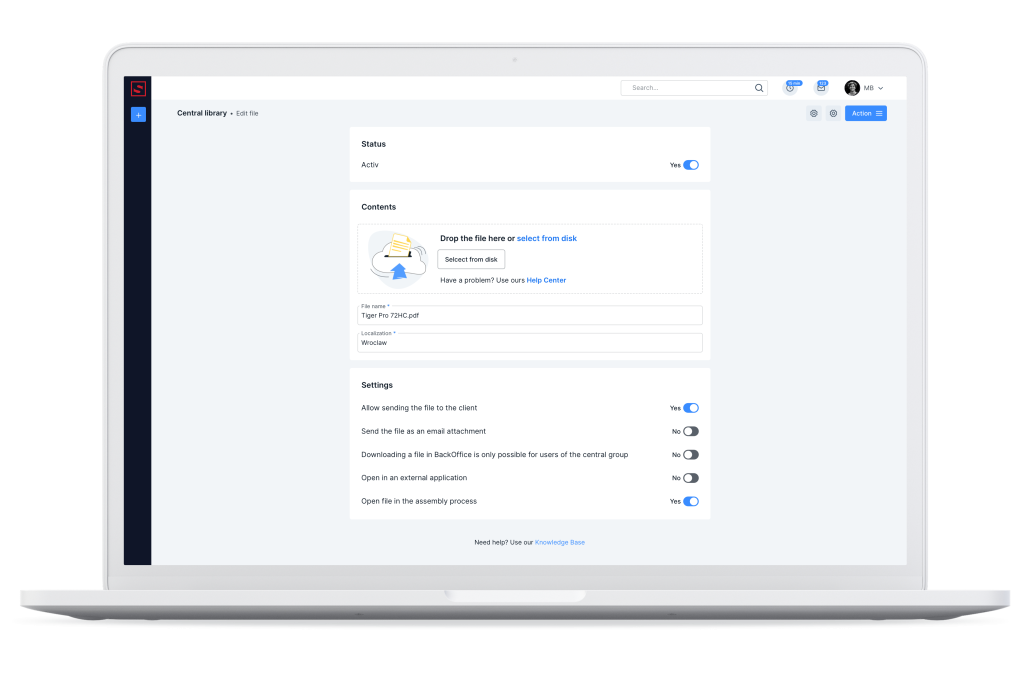
Adding files from the library to an installation order
With the new feature, you will easily send the necessary documents and files to the installation team from the Back Office. Select the Library tab in the side menu. To add a new file in the main window, click the blue square with a white plus.
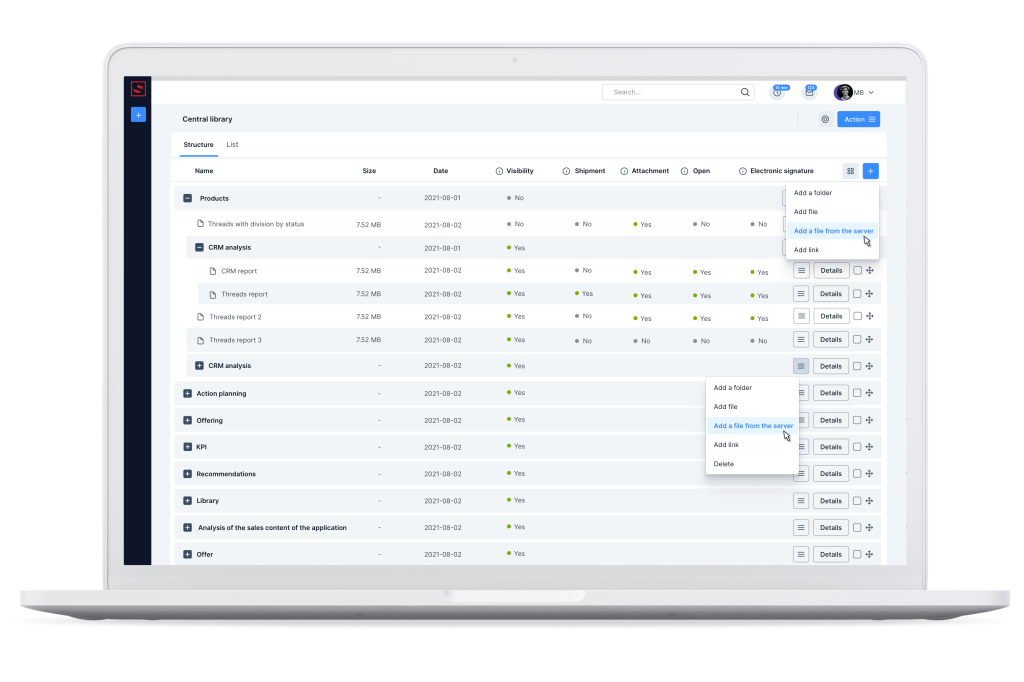
After adding the file, we want to share with the installation team, we click File Details. Enter the settings and move the slider to the right of the Display file in installation process option. The file will automatically be added to the installation order.
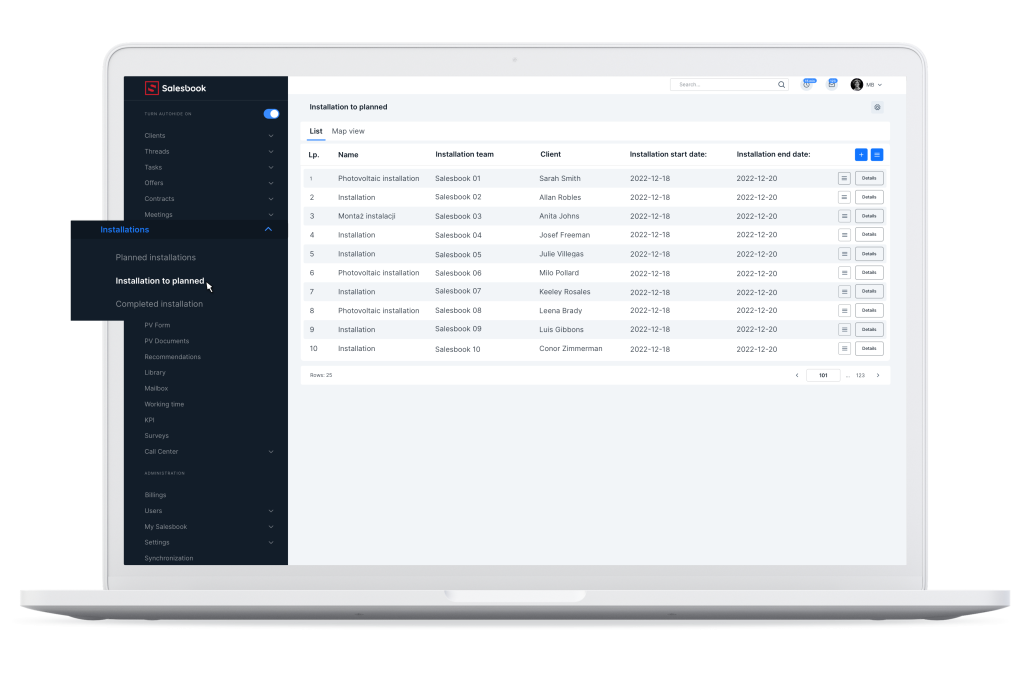
New view of the installations tab
The Installation tab in the side menu is from now on divided into three sections:
- Installation to be scheduled,
- Installation scheduled,
- Installation completed.

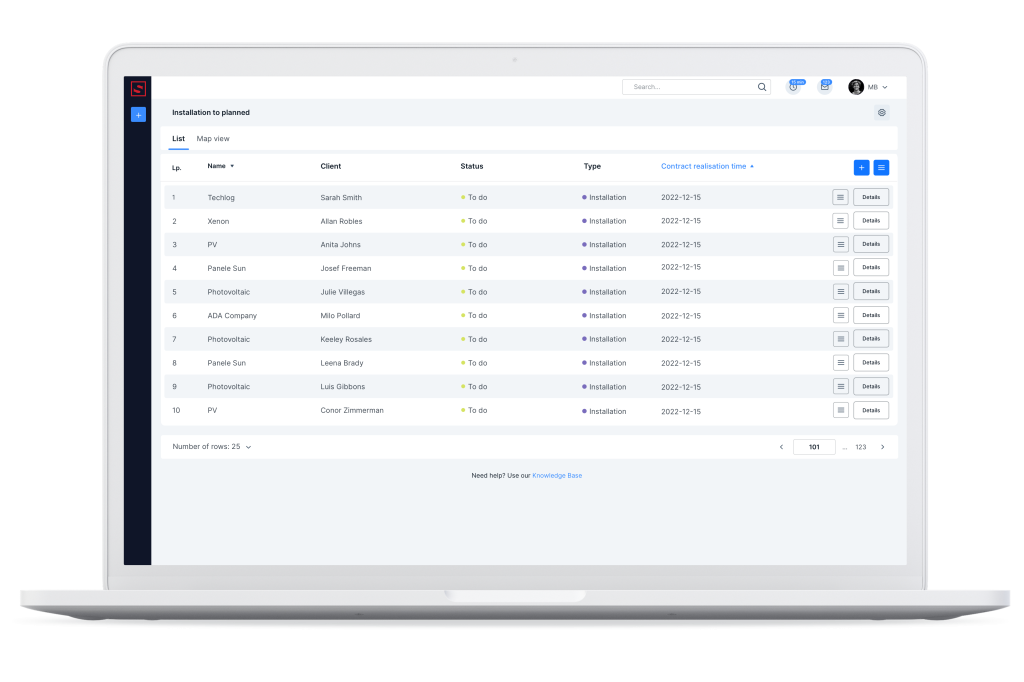
In the section Installation to be scheduled you will find all threads marked with the corresponding status.
We can freely define what status will cause a thread to fall into the list of installation to be scheduled. We define the statuses in the CRM from the administrator level in advance. Thanks to that, the process of dropping threads into this list happens automatically.

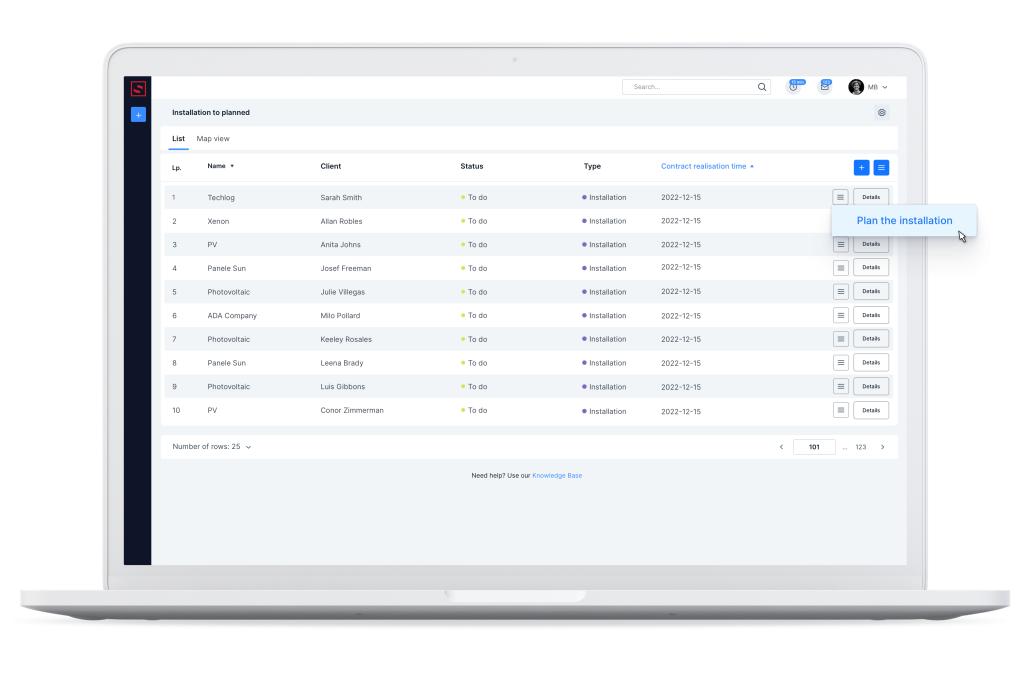
From the list of installation to schedule, we have the option to schedule a specific installation. To do this, we click on the burger menu icon and select Schedule installation.
Also new in the view of this list is the column Contract completion time. In it, you will find information on when the installation must be completed and settled by.
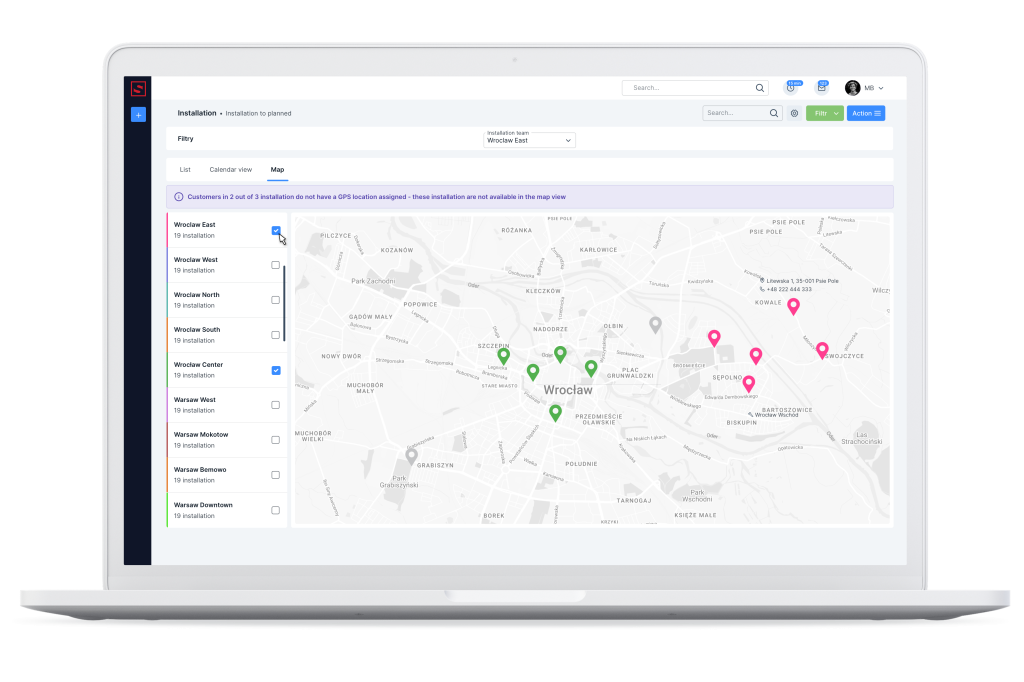
New features in the map view
We can also view all montages to be scheduled in the map view. To the right of the List tab, we find the Map View tab. Our UX specialists have refreshed and unified the map visible in this section.
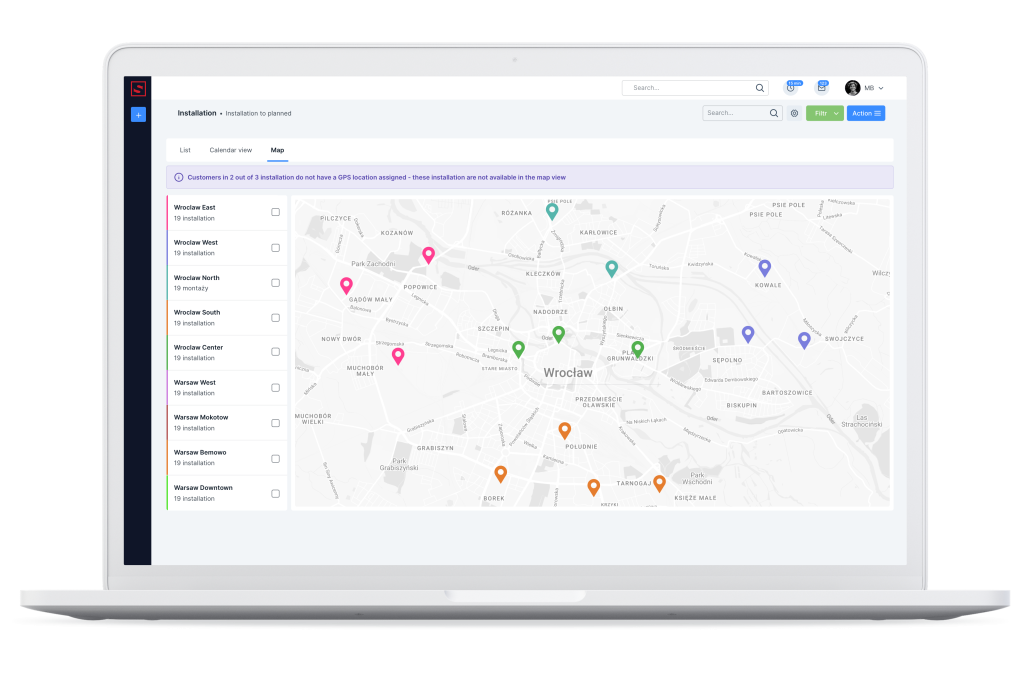
The gray pins mark the installation to be scheduled on the map. When we hover over a given pin, we can see the customer’s details, i.e., contact information and the most important information about the installation itself and the timing of the installation.
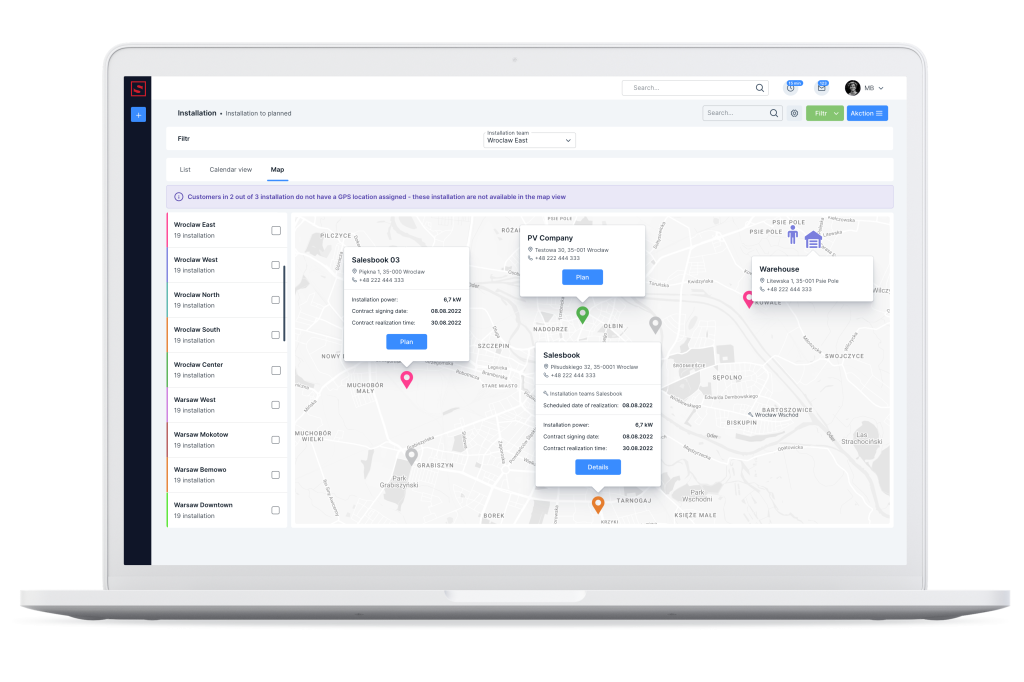
From here we can also go directly to the installation scheduling.
Colored pins indicate installations already scheduled. The color of the pin corresponds to the color with which the installation team responsible for the indicated installation is marked.
A colored character icon denotes installation crews deployed, at different locations on the map. The house icon is the location of the warehouse.
If you see a character icon and a house icon of the same color on the map, it means that a particular warehouse is assigned to an installation team.
With the filter to the left of the map, we can select the selected installation team. This will display on the map the installations assigned exclusively to this team. They will be marked with pins of the same color with which the installation team is marked.
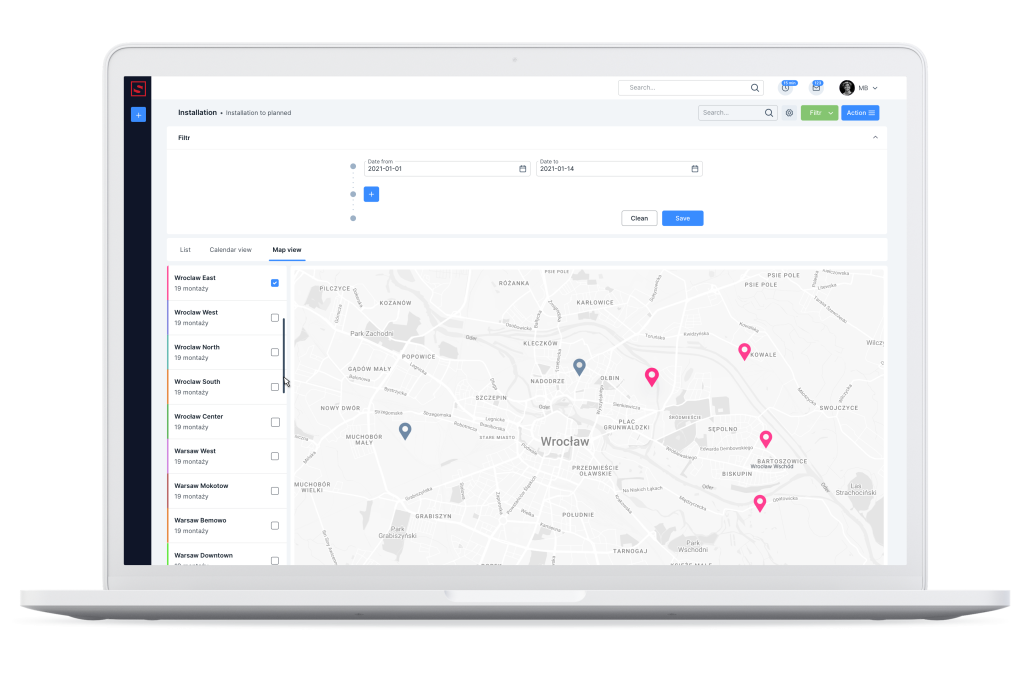
Scheduling installation from the map view level
If we want to schedule an installation from the map view, we click the Schedule installation button. It will appear in the pop-up window when we hover over a particular pin. A window will open where we can schedule the entire process.
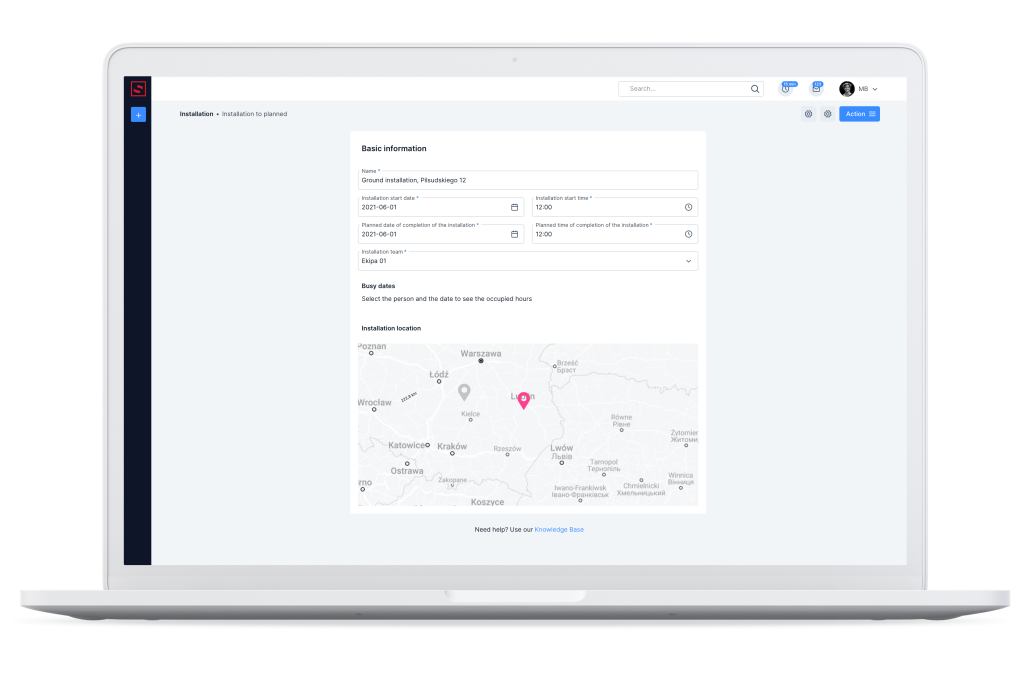
In this window, we give a title, select a team, and specify the start and end date of the installation.
After entering the date, a list of busy dates will appear under the Busy dates field, and if the date we have selected conflicts, the system will suggest alternative dates.
Once you select a date and save the changes, the map will show information with the distances between the scheduled installations on that day. This will allow you to organize the optimal day for the installation team.
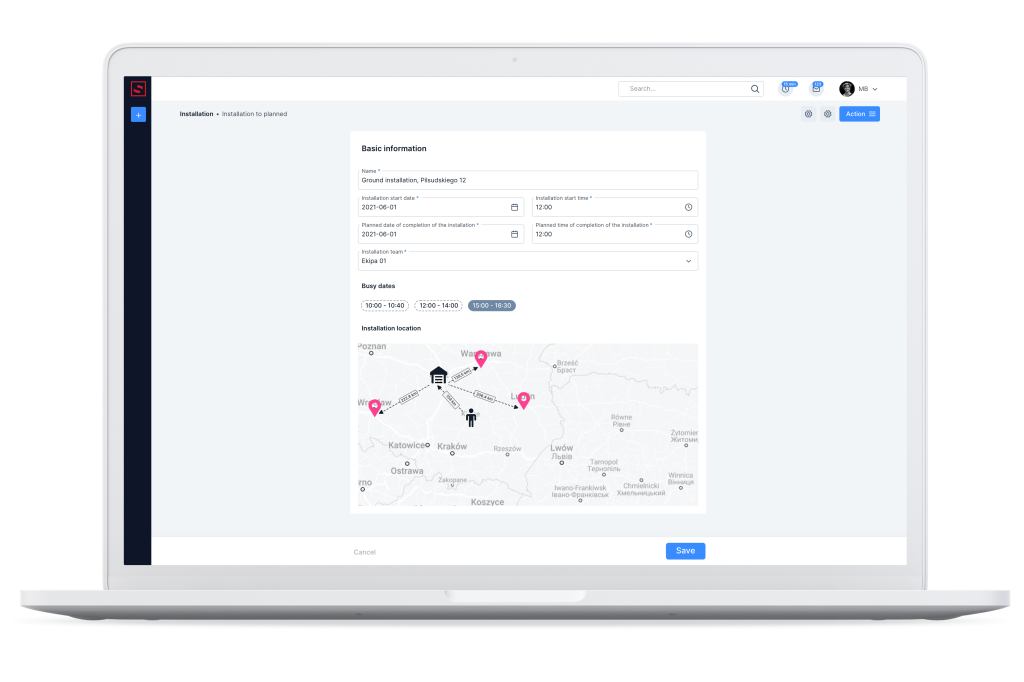
In the Note field, we can leave information for the installation team, such as directions. At the very bottom, we can easily add the files needed to complete the job.
After clicking Create, an email will be sent to the installation team’s email address. It will be notifying them that a new montage has been created.
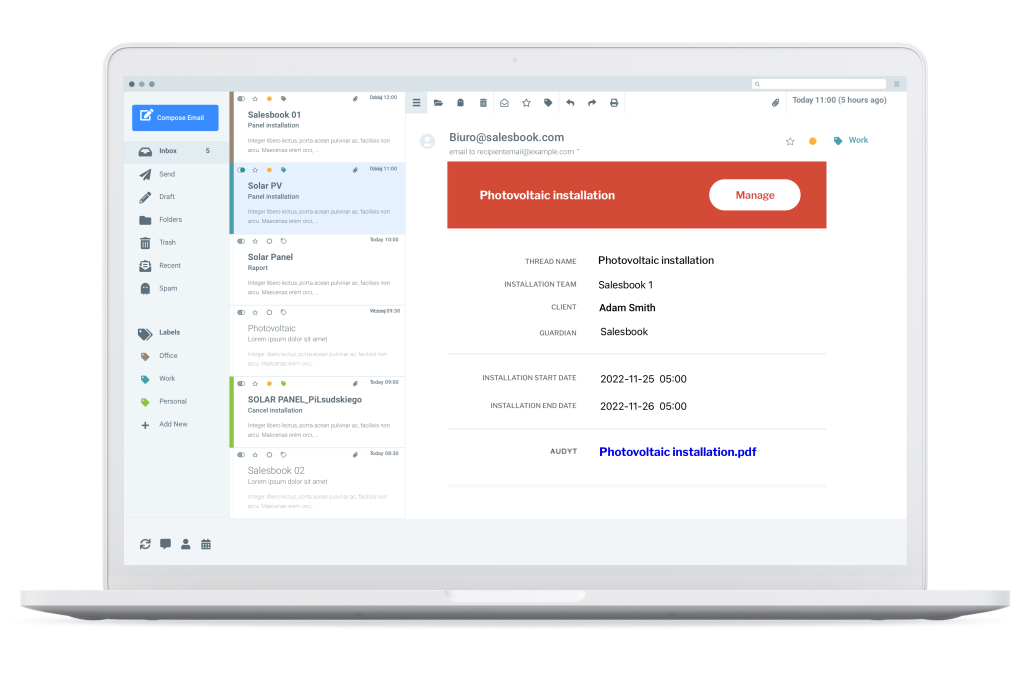
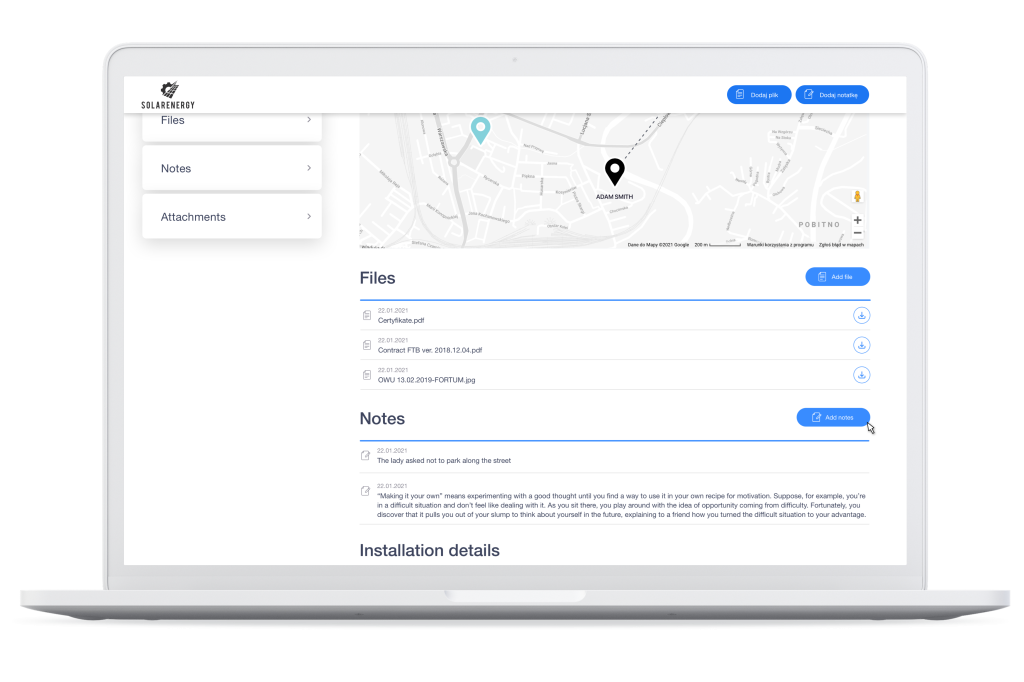
The Manage button in the upper right corner of the message takes the recipient to a browser window. It will display the installation order with attached files and notes. The order will also include customer data and a map.
In the same window, the installation team can add notes, photos and minutes of the installation.

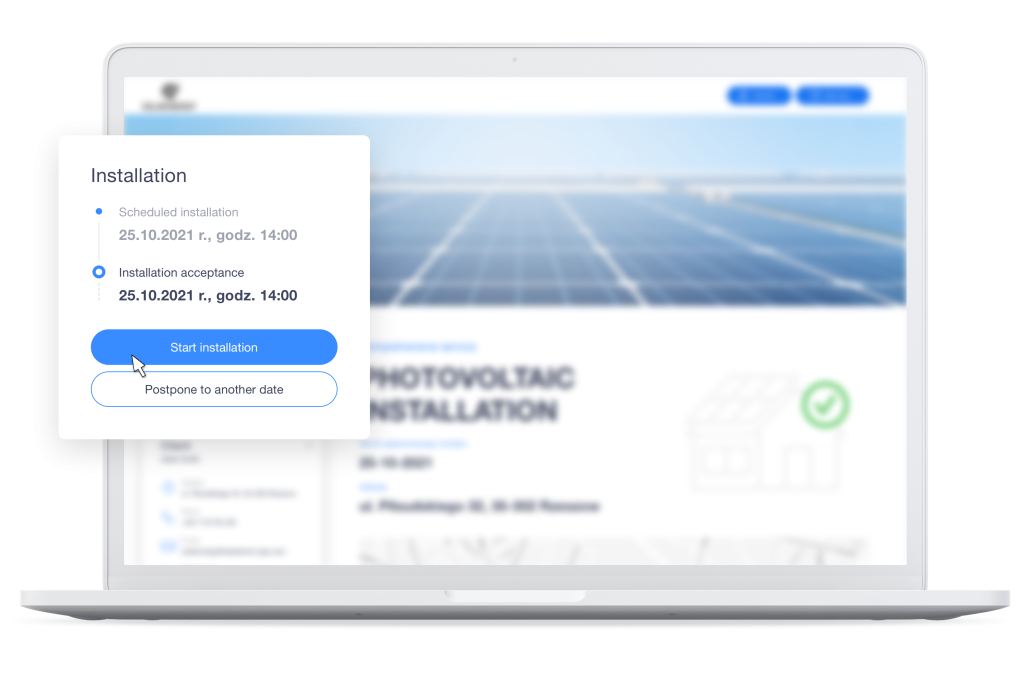
Accepting, rescheduling, and rejecting an installation order
When an installation team receives an e-mail with installation order, from the browser view it can accept such installation, postpone the execution to another date or reject it. All these options are available in the upper left corner of the order.

If you want the team to be unable to reschedule or reject the order on its own, you can disable these options from the Back Office.
After clicking Accept installation, the next steps available to the order recipient will appear.
Once the team is at the customer’s site and begins work, the order recipient selects Start installation.
New options in the Scheduled Installations section in installation planning module
When you schedule a new installation, it will automatically fall into the list of scheduled installations. This list can be found in the Back Office under Installations | Scheduled installations.
From the list we can view the details, open this order, or edit it.
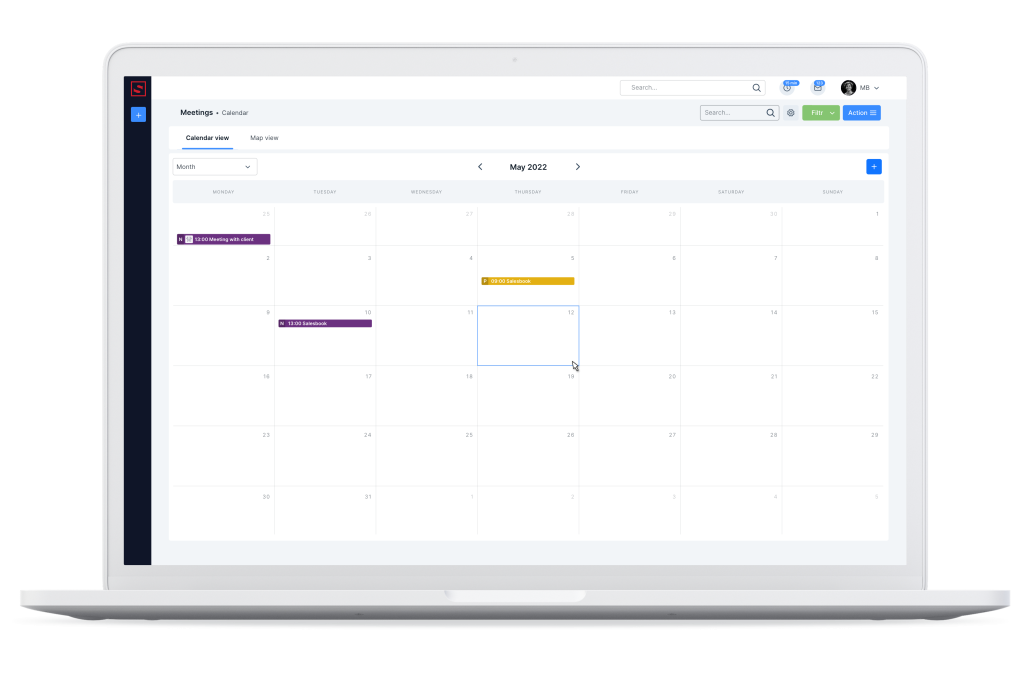
Depending on which view you need to work on now, you can choose between list, map view and calendar view.
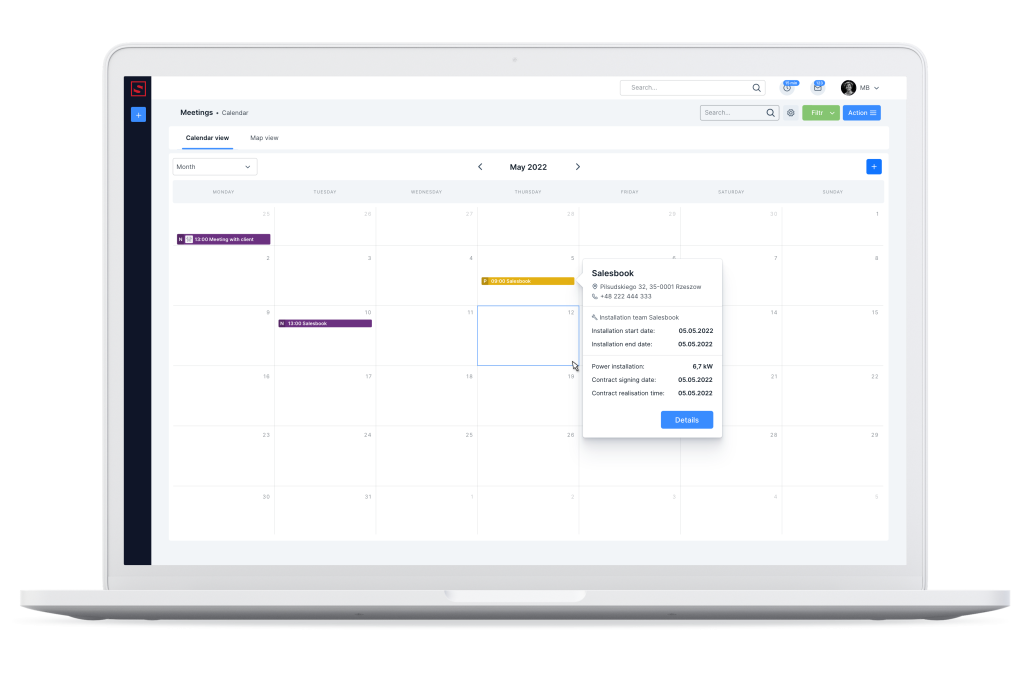
Calendar view with scheduled installations
Similar to the map view, when you hover over an installation scheduled in the calendar, a window with the details of the order will appear. When you click on Installation Details, you will go to a new window with all the details of the selected installation.
Reporting the completed installation process
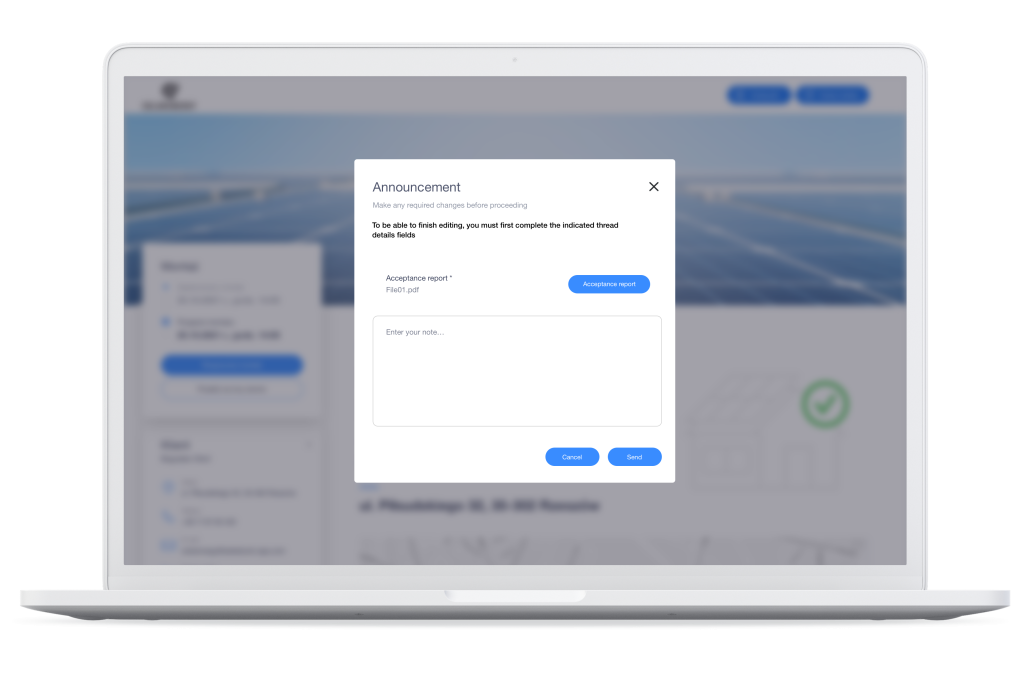
Now when the installation team finishes work at the customer’s site, the representative of the installation team clicks the Finish installation button in the order window.
A new window will then open, in which we can force the installation team to take additional actions, such as entering a note, adding photos, or sending a work acceptance report signed by the customer.
If the team does not add the required attachments, the installation cannot be completed.
Once all the necessary files have been added and the installation is completed, the ordering party will receive an e-mail confirming the completion of the work and all attachments.
Once the installation is completed, the ordering party will receive such an installation for approval.
It will appear in the Back Office from the Completed Installations tab.

Installations in this list can have different statuses. E.g.: Completed, For Acceptance or Settled installation. It means that the installation has been checked and accepted by the ordering party.
If we have an order on the list with a status of to be accepted, we can go into the details of this item, accept or reject such an installation.
If the installation does not meet the requirements, we can reject it and describe exactly the reason for rejection. The installation team will automatically receive an email with an explanation and further recommendations.
Additional options in CRM settings
Especially for our users, we have also made improvements to the CRM system. All this to make working with Salesbook fully automated and intuitive.
Automatic change of thread statuses
Additionally, in order for threads marked with the appropriate status to be automatically transferred between stages of the funnel, you need to configure the thread path.
In the side panel, we click Settings. In the Automate statuses field, we select from the predefined list Change thread status to the next one after the installation is completed.
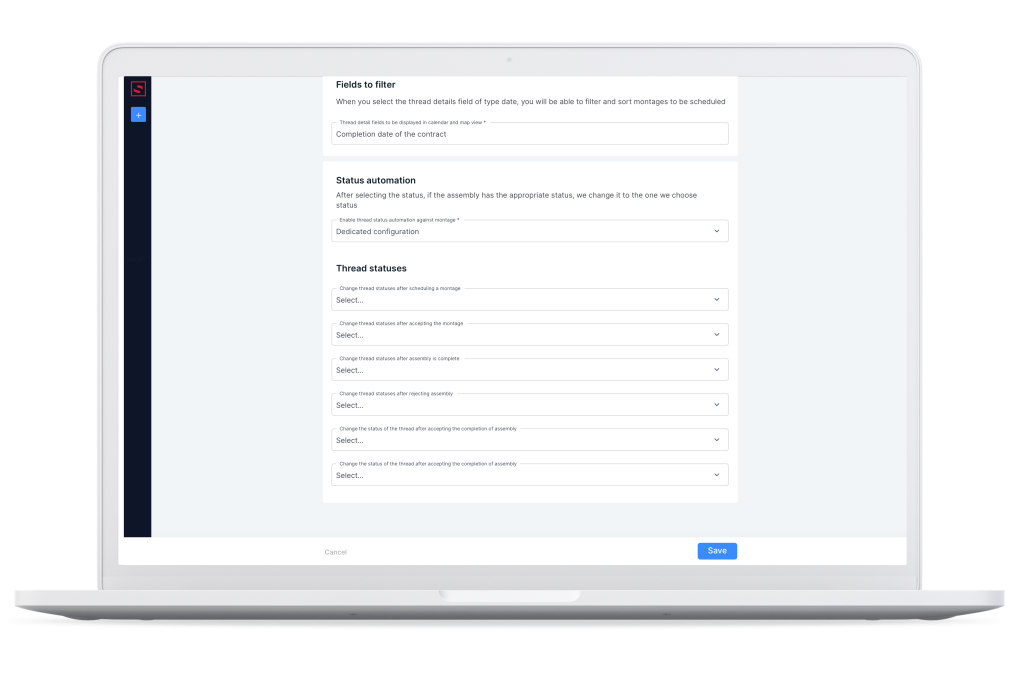
We still have the option Dedicated configuration or no if we do not want to use this option.
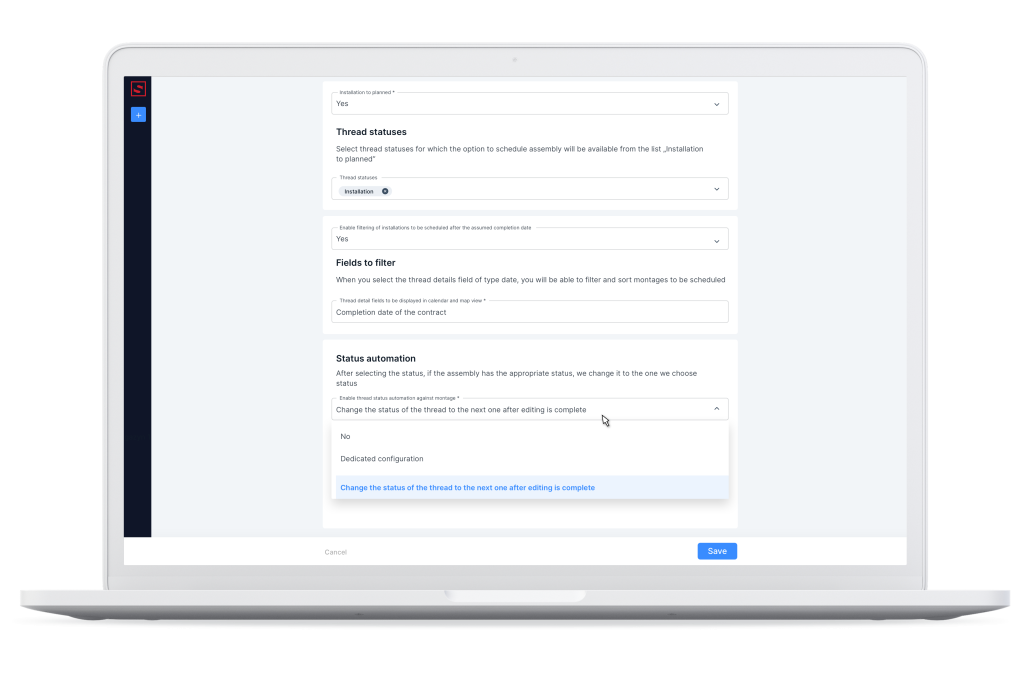
If we choose the dedicated configuration option, we can define for ourselves what will happen to the thread after a specific stage.
Warehouses
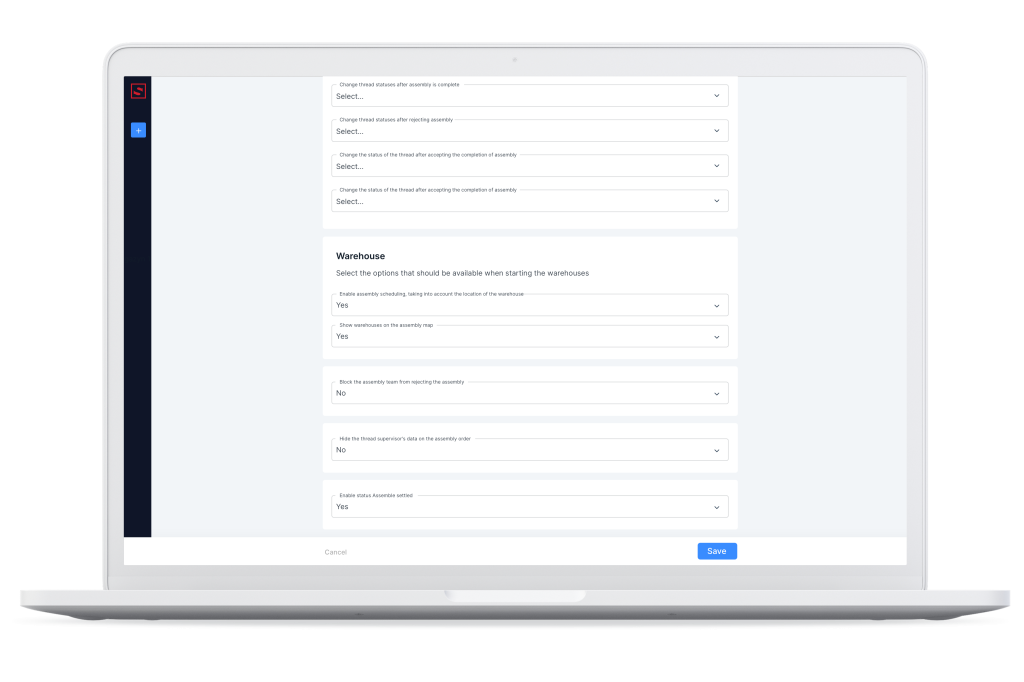
In the settings in installation planning module, we will also find, among other things, the option to block the rejection of an installation order, to display warehouses in the map view and to schedule an installation with the warehouse location in mind.
From this level, we can also hide the supervisor’s data on the installation order sent to the team.
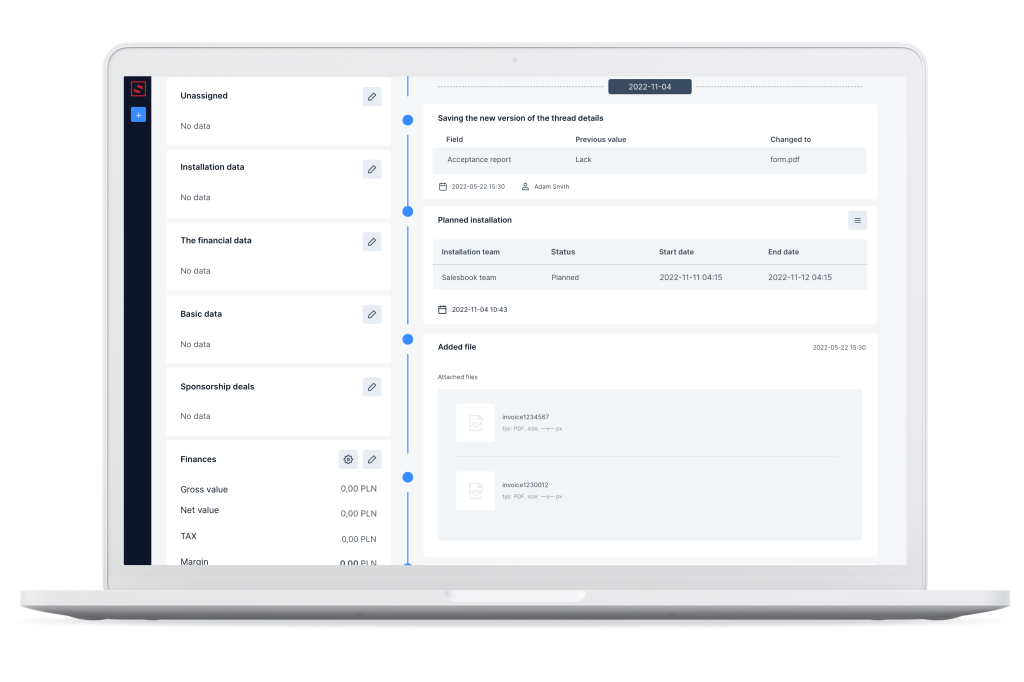
In this field, we can also set what data the thread details will automatically fill in. The system will synchronize the data. We do not have to manually enter the same information in all places.
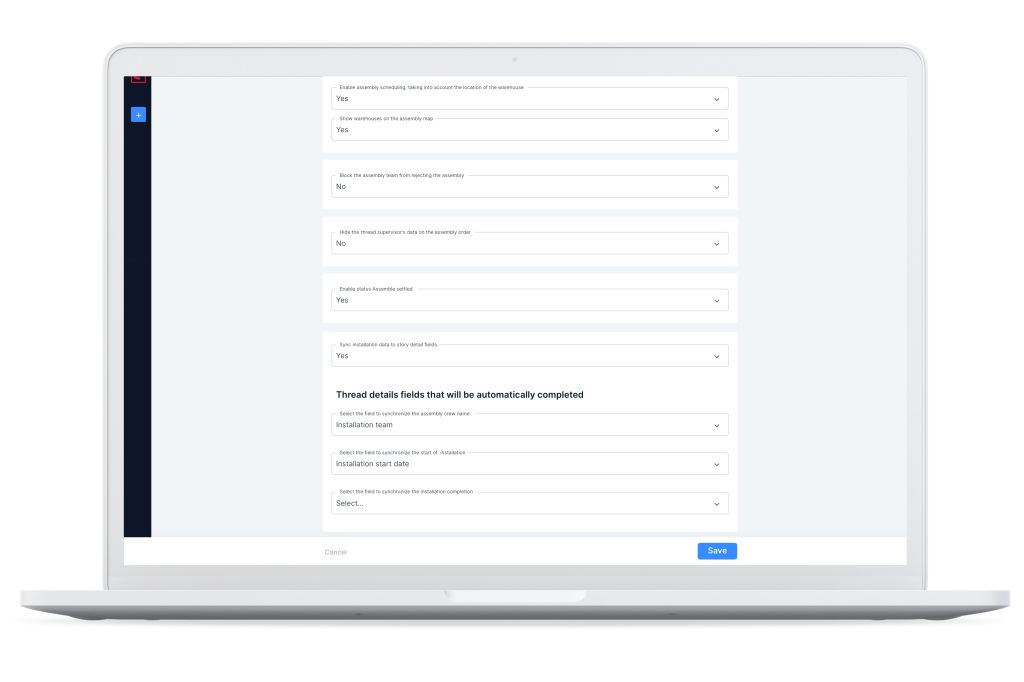
Here, we also have the option to select the information that will be displayed in the installation details window. This window pops up in the map and calendar view.
Installation segmentation
If you enable the installation segmentation option, you can define the list of products that will be available for selection during the planning process.
This means that an additional option will appear in the installation planning window, which will allow you to mark whether the order is for the installation of photovoltaic panels, heat pump or air conditioning.
Want to learn all Salesbook capabilities?
Make an appointment for a free demo with our specialist and learn how to increase sales in the RES industry by 53% with our installation planning module.
Table of Contents